

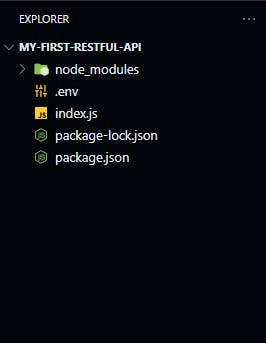
Table of contents
In this post, I'll guide you through the process of creating a simple RESTful API using Node.js, MongoDB, and Express.
Before starting, I'm assuming that you have Node.js, npm, MongoDB and VS Code installed on your machine.
If you haven't yet, then you can check the following:
Let's jump right into it!🚀
Step 1: Setting Up the Project
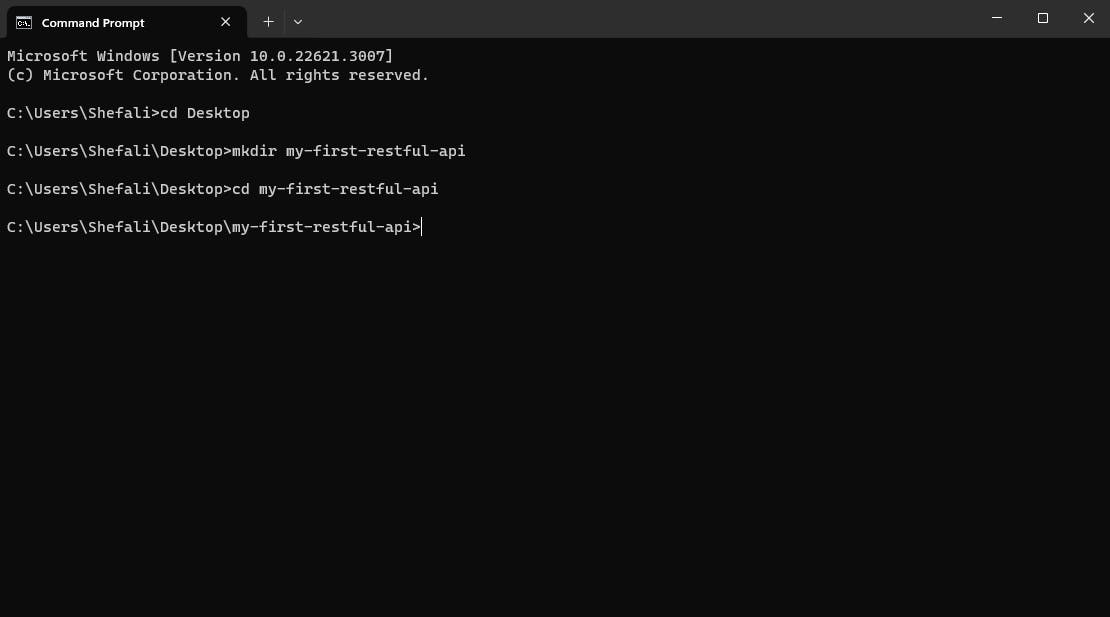
Let's create a new project folder to get started. Open your terminal and run the following commands one by one.
mkdir my-first-restful-api
cd my-first-restful-api
This will create a new directory in your machine.
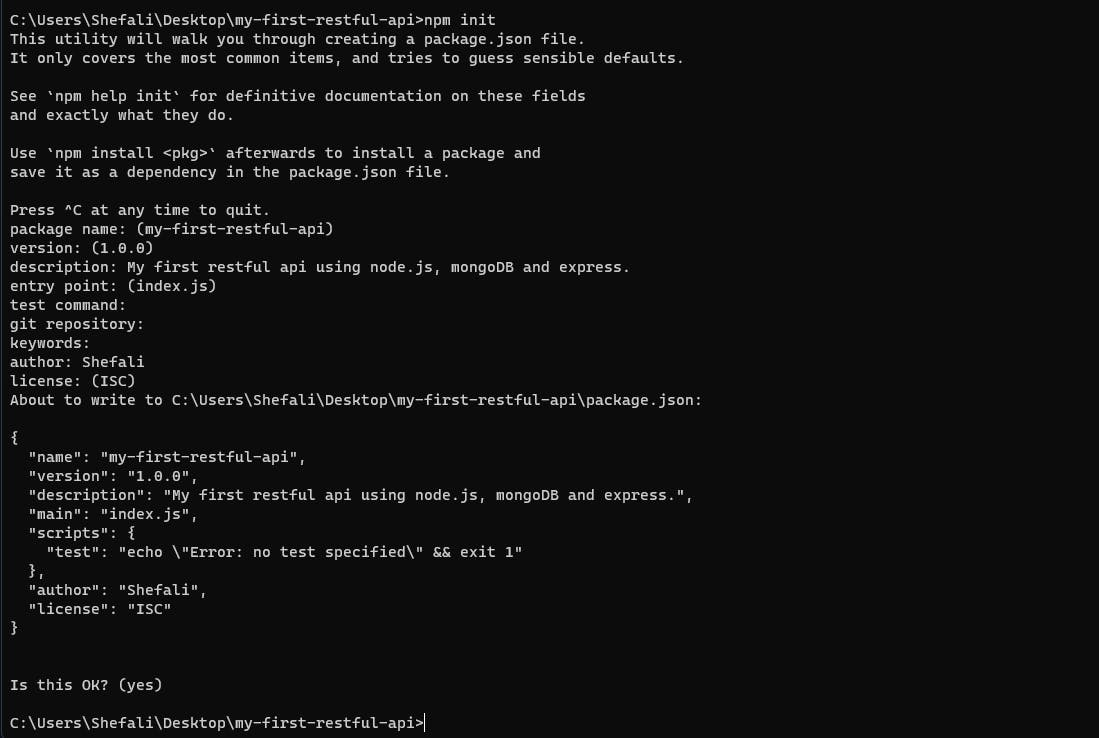
Now, let's initialize our project by running the follwing command in the terminal (make sure you're into your newly created project folder).
npm init
The above command will walk you through creating a package.json file. Enter the details for the query and hit enter to go to the next query.
Or you can run the below command to create a package.json file with default settings.
npm init -y
In the below image, I've used npm init command.
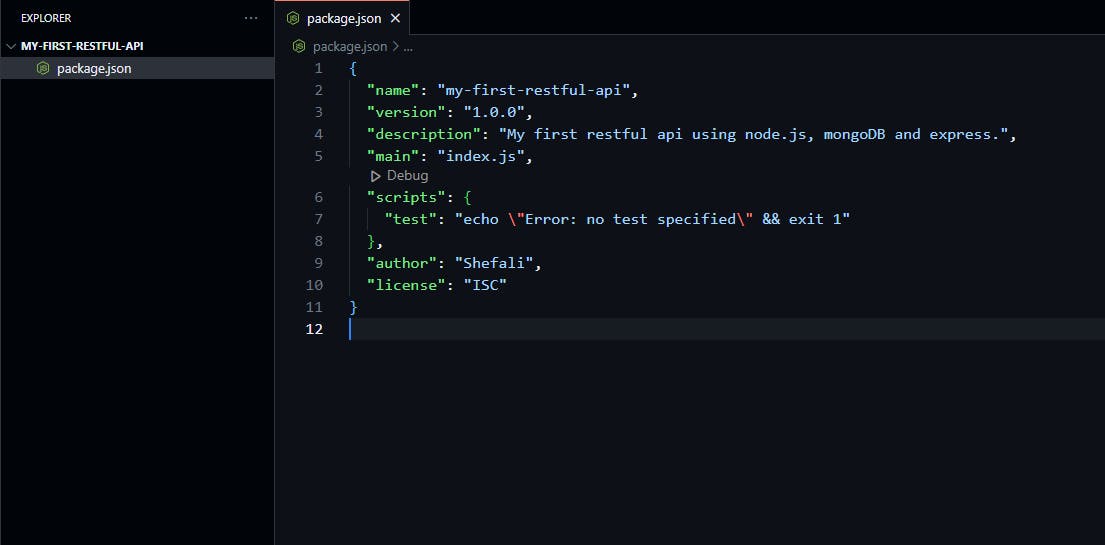
After entering all the details a file named package.json will be created in your project folder as you can see in the below image.
Step 2: Installing Dependencies
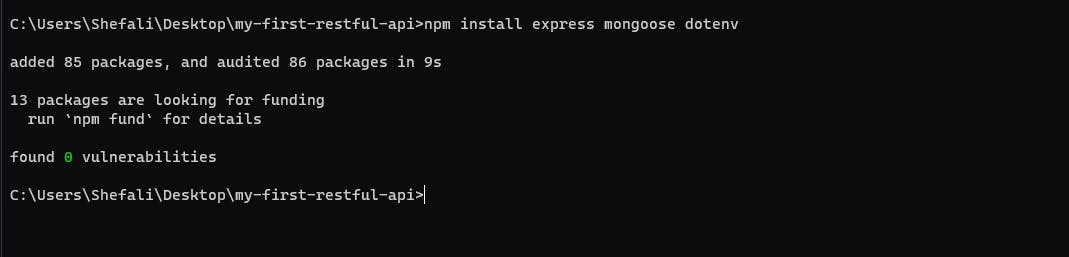
Now let's install the necessary packages for our project by running the following command in the terminal.
npm install express mongoose dotenv
The above command will install
Express: For building the web server.
Mongoose: An ODM (Object Data Modeling) library for MongoDB.
dotenv: For loading environment variables from a
.envfile.
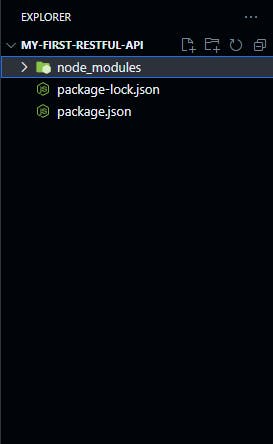
After running the above command, this should be the structure of your project folder.
What is .env file and why we need it?
A .env file is used to store configuration variables, such as API keys, database credentials, and other sensitive information, separately from the codebase for security purpose.
Note: If you push your code to GitHub, then make sure you don't push .env file, so that no one can access your sensitive information. You can do so by adding .env in your .gitignore file.
Step 3: Set Up a Basic Express app
Create a file named index.js in your root directory.
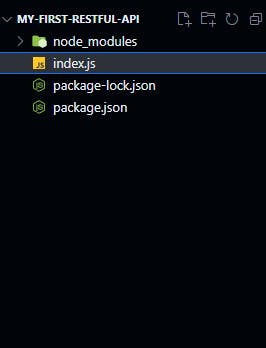
Now, add the following code to the index.js file.
const express = require('express');
const app = express();
const port = 3000;

app.get('/', (req, res) => {
  res.send('Hello World!');
});

app.listen(port, () => {
  console.log(`Server is listening on port ${port}`);
});
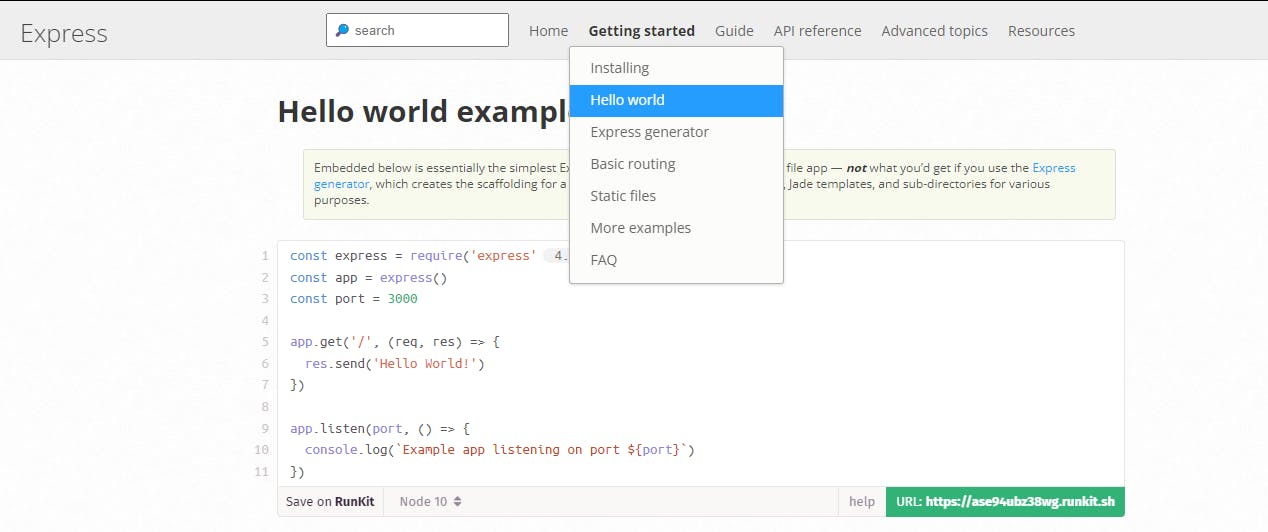
You might be wondering, do I have to remember the above code or from where this code has come?🤔
Let me tell you where you can find this code.
Go to expressjs.com
Hover over Getting started and click on Hello world.
You'll find the code for the basic hello world example.
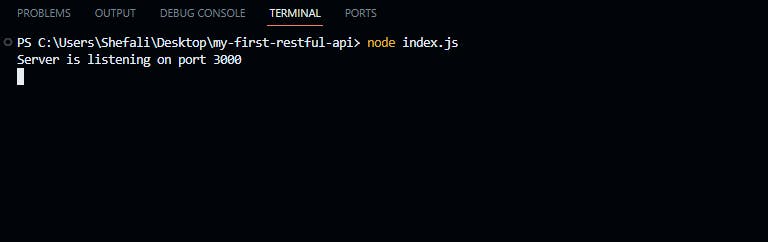
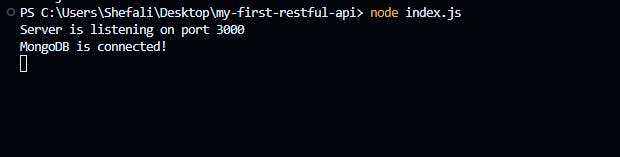
Now, let's run our server by the following command:
node index.js
(For this command, I've used VS Code in-built terminal. You can use your machine's terminal as well.)
This should be the output in your terminal.
In your browser, if you go to localhost:3000 then you'll see Hello world! on the page as follows.
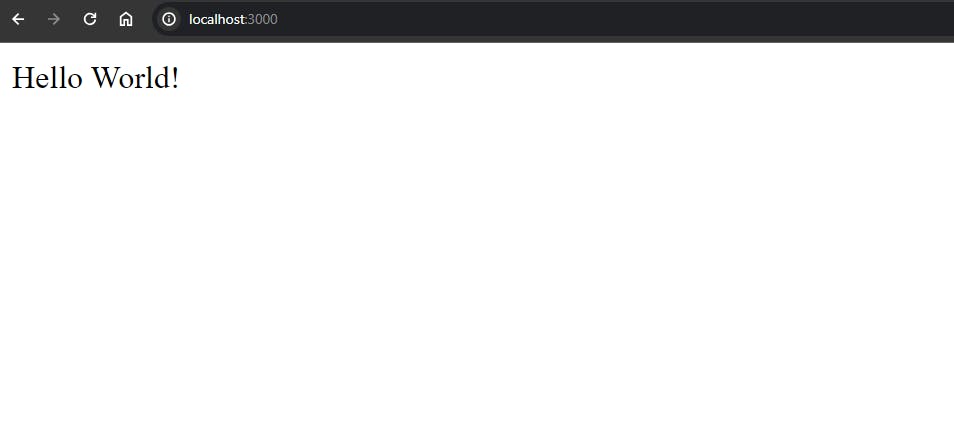
So, our server is running properly.
Step 4: Creating a MongoDB Database
In this step, we will create a Database on MongoDB Atlas.
Go to MongoDB Atlas and create an account or sign-in if you already have one.
If you're creating a new account then it will ask you to create a username and password, so create those. Then in the second step choose "My Local Environment" and fill your IP address. After that click on "Finish and Close".

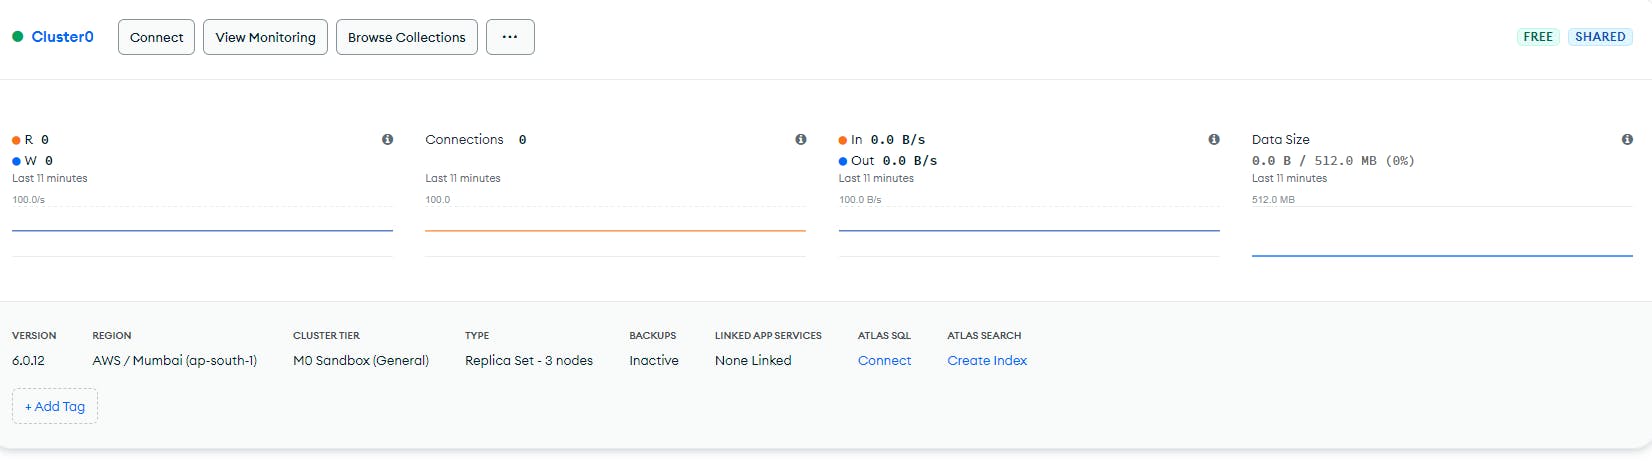
Then go to Database (You'll find on the left menu) and click on Create button (on the right side of the screen). Create a Free Shared Cluster.
Now on the home page of the cluster, click on connect button.
The following window will appear and then click on the Compass link.
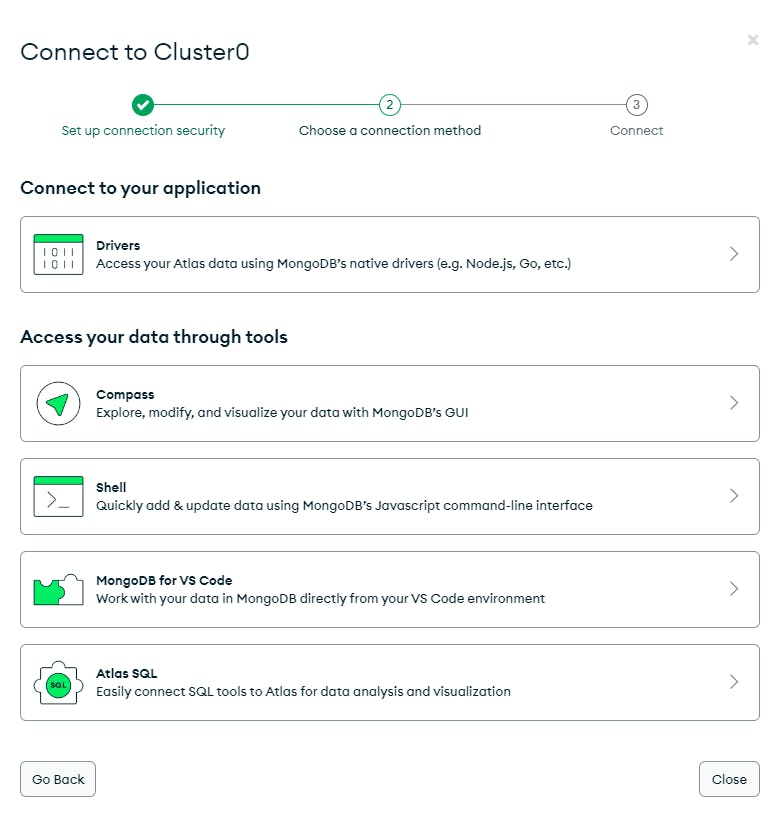
Copy the connection string and replace <password> with your password which you've created before. Also install the MongoDB Compass if you haven't yet.
Your connection string should look like this.
mongodb+srv://shefali:********@cluster0.sscvg.mongodb.net/
In your connection string, instead of "shefali" this will display your username and instead of "********", your password.
Step 5: Creating a .env file
To protect our mongoDB connection string, let's create a new file named .env in the root directory.
Add the following code to the .env file.
MONGODB_URL=<Your MongoDB Connection String>
Replace <Your MongoDB Connection String> with the connection string you obtained from MongoDB Atlas. Now your .env file should look like this.
MONGODB_URL=mongodb+srv://shefali:********@cluster0.sscvg.mongodb.net/my-first-restful-api
In the above string, at last I've added my-first-restful-api which is our database name.
Step 6: Connecting to MongoDB using Mongoose
Add the following code to your index.js file to connect the mongoDB.
const mongoose = require('mongoose');
require('dotenv').config(); //for using variables from .env file.

mongoose.connect(process.env.MONGODB_URL).then(() => {
  console.log("MongoDB is connected!");
});
Here process.env.MONGODB_URL will get the connection string from the .env file.
Your final code should look like the following:
const express = require("express");
const mongoose = require("mongoose");

require("dotenv").config(); //for using variables from .env file.

const app = express();
const port = 3000;

mongoose.connect(process.env.MONGODB_URL).then(() => {
  console.log("MongoDB is connected!");
});

app.get("/", (req, res) => {
  res.send("Hello World!");
});

app.listen(port, () => {
  console.log(`Server is listening on port ${port}`);
});
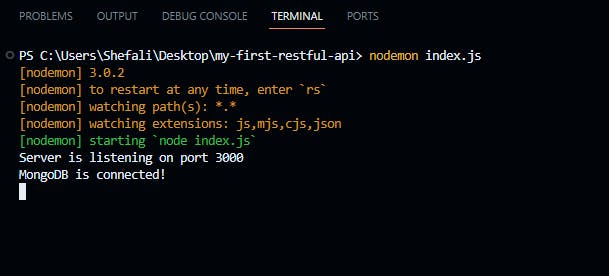
Now when you restart your server using node index.js command, your terminal output should be like this.
Note: If you don't see any changes, then make sure to restart your server.
In this step, we have successfully connected to MongoDB using mongoose.
Step 7: Defining a simple schema
Let's create a simple schema for our project. (Know more about Schemas)
For this, create a new folder named model in your root directory and inside that folder create a file named todo.js.

Add the following code to the todo.js file.
const mongoose = require("mongoose");
const { Schema } = mongoose;

const todoSchema = new Schema({
  title: {
    type: String
  },
  description: {
    type: String
  },
});

const Todo = mongoose.model("Todo", todoSchema);
module.exports = Todo;
And import this model in your index.js file like this.
const Todo = require("./model/todo");
Step 8: Implementing CRUD Operations
Let's start creating routes for basic CRUD operations.
Create
Add the following code to the index.js file.
// Create an todo item
app.post("/todos/create", async (req, res) => {
  try {
    const newTodo = await Todo.create(req.body);
    res.status(201).json(newTodo);
  } catch (error) {
    res.status(500).json({ error: "Internal Server Error" });
  }
});
In the above code,
There's an HTTP POST endpoint
/todos/createfor creating a new todo item.When a POST request is made to
/todos/create, the code inside theasyncfunction is executed.It uses the
Todo.createmethod (All methods for models) to create a new todo item based on the data in the request body (req.body).If the creation is successful, it responds with a status code 201 and sends the newly created todo item in JSON format as a response.
If there's an error during the process, it catches the error and responds with a status code 500 and error message Internal Server Error.
In simpler terms, this code handles requests to create a new todo item. It tries to create the item, and if successful, it responds with the created item. If there's an issue during the process, it responds with an error message.
Read
Replace the code of app.get to the following code in the index.js file.
// Read all todos
app.get("/todos", async (req, res) => {
  try {
    const todos = await Todo.find();
    res.status(200).json(todos);
  } catch (error) {
    console.log(error);
    res.status(500).json({ error: "Internal Server Error" });
  }
});
In the above code,
There's an HTTP GET endpoint
/todosfor getting the todo items.When a GET request is made to
/todos, the code inside theasyncfunction is executed.It uses the
Todo.findmethod (All methods for models) to fetch all the todo items from the database.If the fetching is successful, it responds with a status code 200 and sends all the todo items in JSON format as a response.
If there's an error during the process, it catches the error and responds with a status code 500 and error message Internal Server Error.
Update
Add the following code to the index.js file.
// Update a todo by ID
app.put("/todos/:id", async (req, res) => {
  try {
    const updatedTodo = await Todo.findByIdAndUpdate(req.params.id, req.body, {
      new: true,
    });
    res.status(200).json(updatedTodo);
  } catch (error) {
    res.status(500).json({ error: "Internal Server Error" });
  }
});
In the above code,
There's an HTTP PUT endpoint
/todos/:id, where:idis a placeholder for a specific todo item's id.When a PUT request is made, it tries to update a todo in the database with the specified ID (
req.params.id) using theTodo.findByIdAndUpdatemethod (All methods for models).The new data for the todo is expected to be in the request body (
req.body). This data is sent by the client making the PUT request.The third argument
{ new: true }ensures that the method returns the updated todo after the update operation.If the update is successful, it responds with a status 200 and sends the updated todo in JSON format in the response body.
If any error occurs during the update process (for example, if the specified ID is not found), it catches the error and responds with status 500 and error message Internal Server Error.
Delete
Add the following code to the index.js file.
// Delete a todo by ID
app.delete("/todos/:id", async (req, res) => {
  try {
    await Todo.findByIdAndDelete(req.params.id);
    res.status(204).send();
  } catch (error) {
    res.status(500).json({ error: "Internal Server Error" });
  }
});
In the above code,
There's an HTTP DELETE endpoint
/todos/:id, where:idis a placeholder for a specific todo item's id.When a DELETE request is made, it tries to delete a todo in the database with the specified ID (
req.params.id) using theTodo.findByIdAndDeletemethod (All methods for models).If the deletion is successful, it responds with a status 204(No Content).
If any error occurs during the deleting process (for example, if the specified ID is not found), it catches the error and responds with status 500 and error message Internal Server Error.
Now, before testing our API, we need to add the following line of code to our index.js file, because we will read the data in JSON format.
//middleware provided by Express to parse incoming JSON requests.
app.use(express.json());
Now, your index.js file should look like this.
const express = require("express");
const mongoose = require("mongoose");
const Todo = require("./model/todo");

require("dotenv").config(); //for using variables from .env file.

const app = express();
const port = 3000;

//middleware provided by Express to parse incoming JSON requests.
app.use(express.json());

mongoose.connect(process.env.MONGODB_URL).then(() => {
  console.log("MongoDB is connected!");
});

// Create an todo item
app.post("/todos/create", async (req, res) => {
  try {
    const newTodo = await Todo.create(req.body);
    res.status(201).json(newTodo);
  } catch (error) {
    console.log(error);
    res.status(500).json({ error: "Internal Server Error" });
  }
});

// Read all todos
app.get("/todos", async (req, res) => {
  try {
    const todos = await Todo.find();
    res.status(200).json(todos);
  } catch (error) {
    console.log(error);
    res.status(500).json({ error: "Internal Server Error" });
  }
});

// Update a todo by ID
app.put("/todos/:id", async (req, res) => {
  try {
    const updatedTodo = await Todo.findByIdAndUpdate(req.params.id, req.body, {
      new: true,
    });
    res.status(200).json(updatedTodo);
  } catch (error) {
    res.status(500).json({ error: "Internal Server Error" });
  }
});

// Delete a todo by ID
app.delete("/todos/:id", async (req, res) => {
  try {
    await Todo.findByIdAndDelete(req.params.id);
    res.status(204).send();
  } catch (error) {
    res.status(500).json({ error: "Internal Server Error" });
  }
});

app.listen(port, () => {
  console.log(`Server is listening on port ${port}`);
});
Step 9: Testing the API
By using the command node index.js, we have to restart our server each time. To avoid this you can install nodemon using the following command. This restarts the server automatically each time you make the changes to your file.
npm install -g nodemon
Now run your server using the follwing command.
nodemon index.js
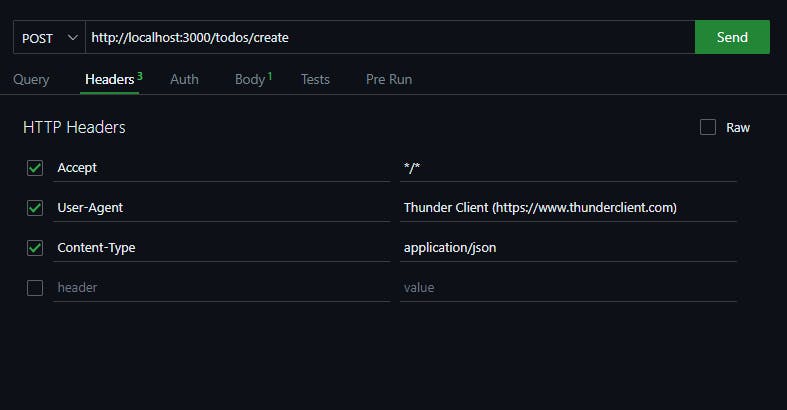
For testing the API, I'm using the VS Code extension named Thunder Client. You can use Postman as well.
Let's test our API now.
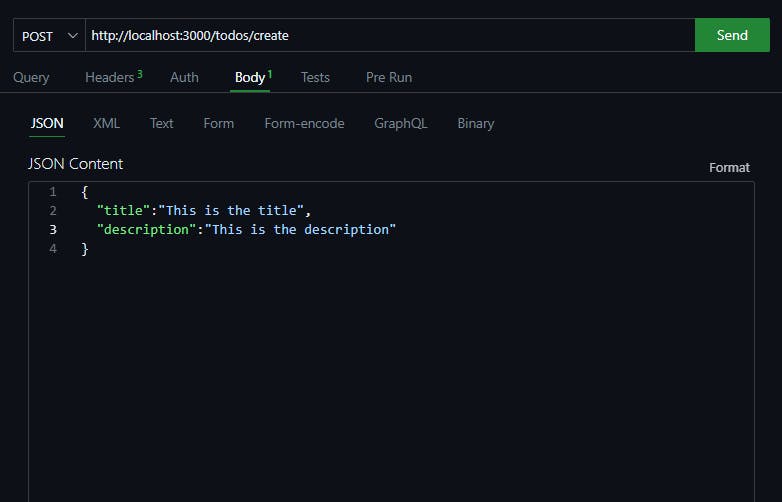
Create a new todo item using a POST request
In the Headers tab, add Content-Type to application/json, choose POST and write the URL like the image below.
In the Body tab, add title and description of the todo item as shown in the image.
After that, click on the Send button and you'll get the following response.
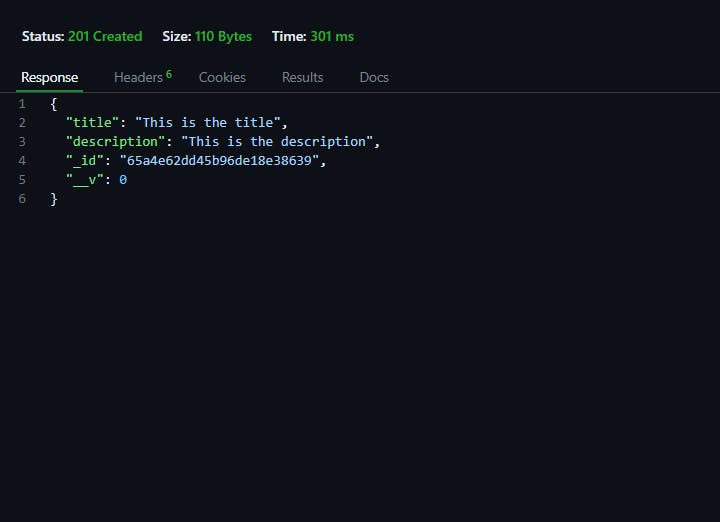
We have successfully created our first todo item. You can create more todo items with different titles and descriptions using the same process.
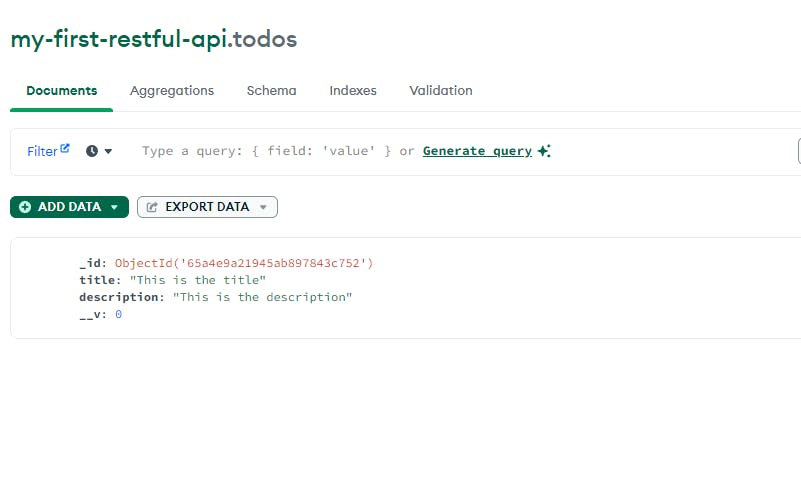
You can also see these items in your MongoDB compass app as well after connecting with your connection string, like the below image.
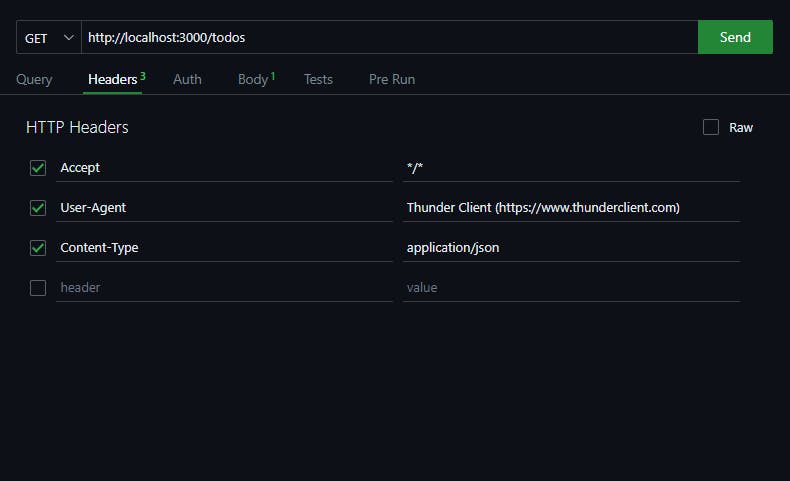
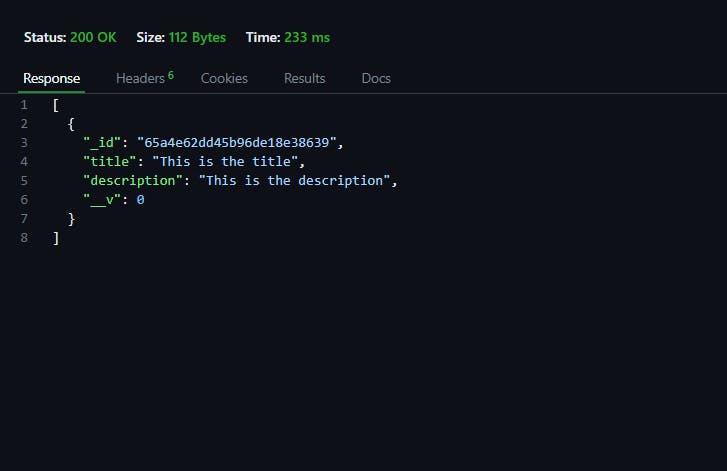
Get all todos using a GET request
For getting the todos, choose GET and write the URL like the image below and click on the Send button.
You'll get the response as shown in the image.
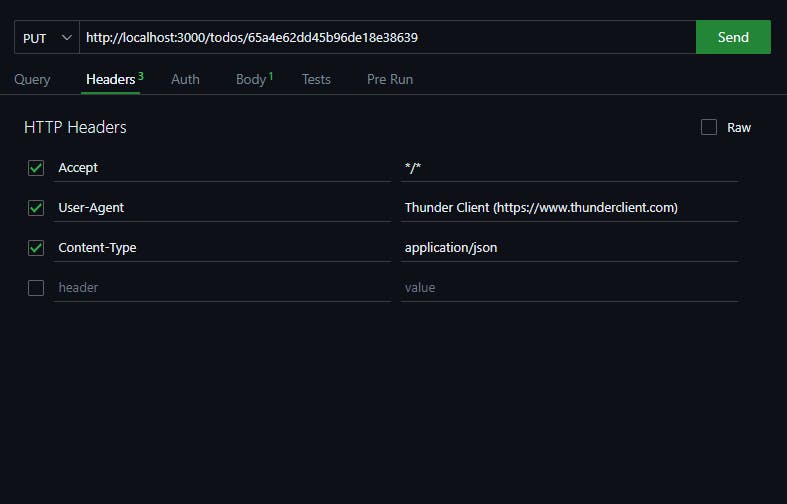
Update a todo item using a PUT request
For updating the todo, we will need the id of the todo item. So copy the id of the todo which you got in the previous response.
Choose PUT and write the URL as shown in the image.
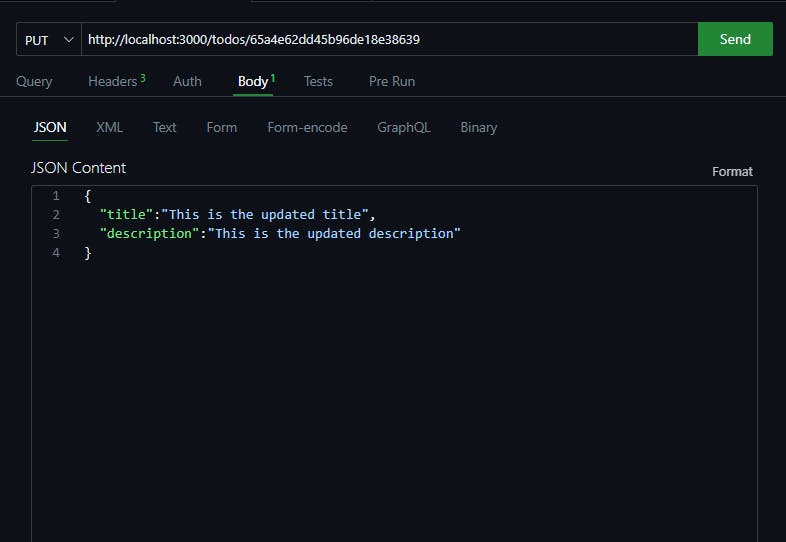
Now, in the Body tab, update the title and description.
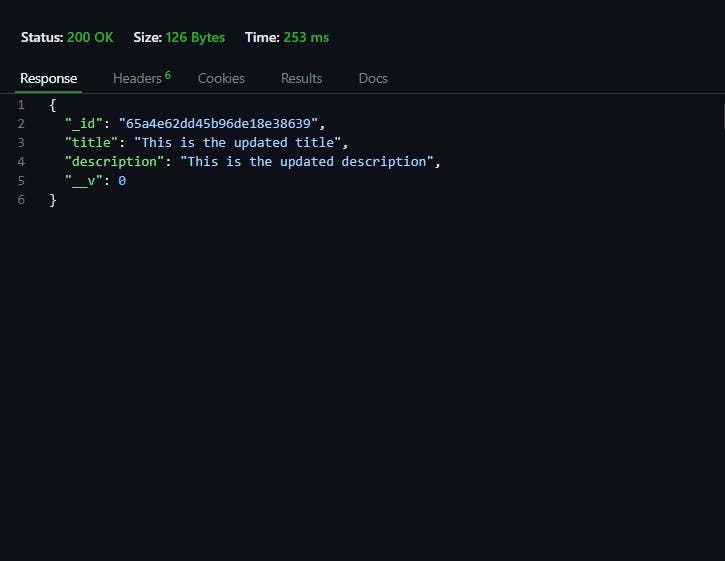
Click on the Send button and you'll get the below response.
Delete a todo item using a DELETE request
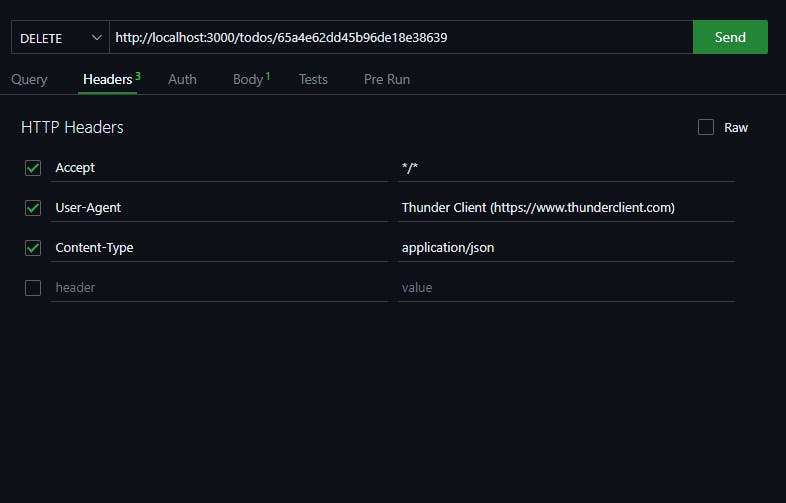
For deleting a todo item, choose DELETE and write the URL as shown in the image.
After clicking the Send button, you'll get the following response.

Our todo item has been deleted.
Congratulations! 🎉
You've successfully created a RESTful API using Node.js, MongoDB, and Express.
That’s all for today.
I hope it was helpful.
Thanks for reading.
For more content like this, click here.
You can also follow me on X(Twitter) for getting daily tips on web development.
Keep Coding!!